
How to Dub a Video Into Another Language
Dubbing used to mean a recording booth, a cast and an invoice. The pipeline underneath hasn't changed — but every step of it can now run on a laptop, in an afternoon, for the price of a lunch.
Every dubbing job, human or automated, is the same four steps: transcribe the original speech, translate each line to the target language, re-voice every line, and mix the new voices over the background audio. Tools like SwiftDub do all four in the browser from a single video file — a short clip is finished in minutes, and you don't need to speak the target language to do it.
This guide walks the whole path on a real clip, points out where dubs actually go wrong, and ends with a checklist worth stealing before you publish anything. If you only have a minute: the steps below in order, screenshots included, and the honest bits about timing and cost at the end.
The four steps of any dubbing job
Strip away the studio and you're left with the same workflow a 1960s dubbing stage followed, just compressed:
- Transcribe. Speech recognition turns the soundtrack into text — but the useful version isn't a wall of text. It's line-by-line, with word-level timestamps and a label for each speaker, because everything downstream needs to know who says what, and exactly when.
- Translate. Here's the part people underestimate: a dub translation is not a subtitle translation. Spoken Spanish routinely runs longer than spoken English; Japanese runs shorter. If a translated line doesn't fit its time slot, the voice either races or spills into the next speaker's turn. Good pipelines translate to the clock — condensing each line until it fits, then flagging what didn't fit.
- Re-voice. New speech is generated for every line, ideally in a voice that fits the speaker on screen. The two families here: a fresh generic voice (fast, cheap, disconnects the audience from the person speaking) and speaker-preserving voices, which we'll get to.
- Mix. The original music and effects stay; the dialogue track is replaced. Then it's back in an MP4.
That's it. Everything else is quality control.
Dubbing a video, step by step
Here's the same four steps in SwiftDub, on an eight-second two-speaker clip. The free plan covers clips like this, so you can follow along with your own file before spending anything.
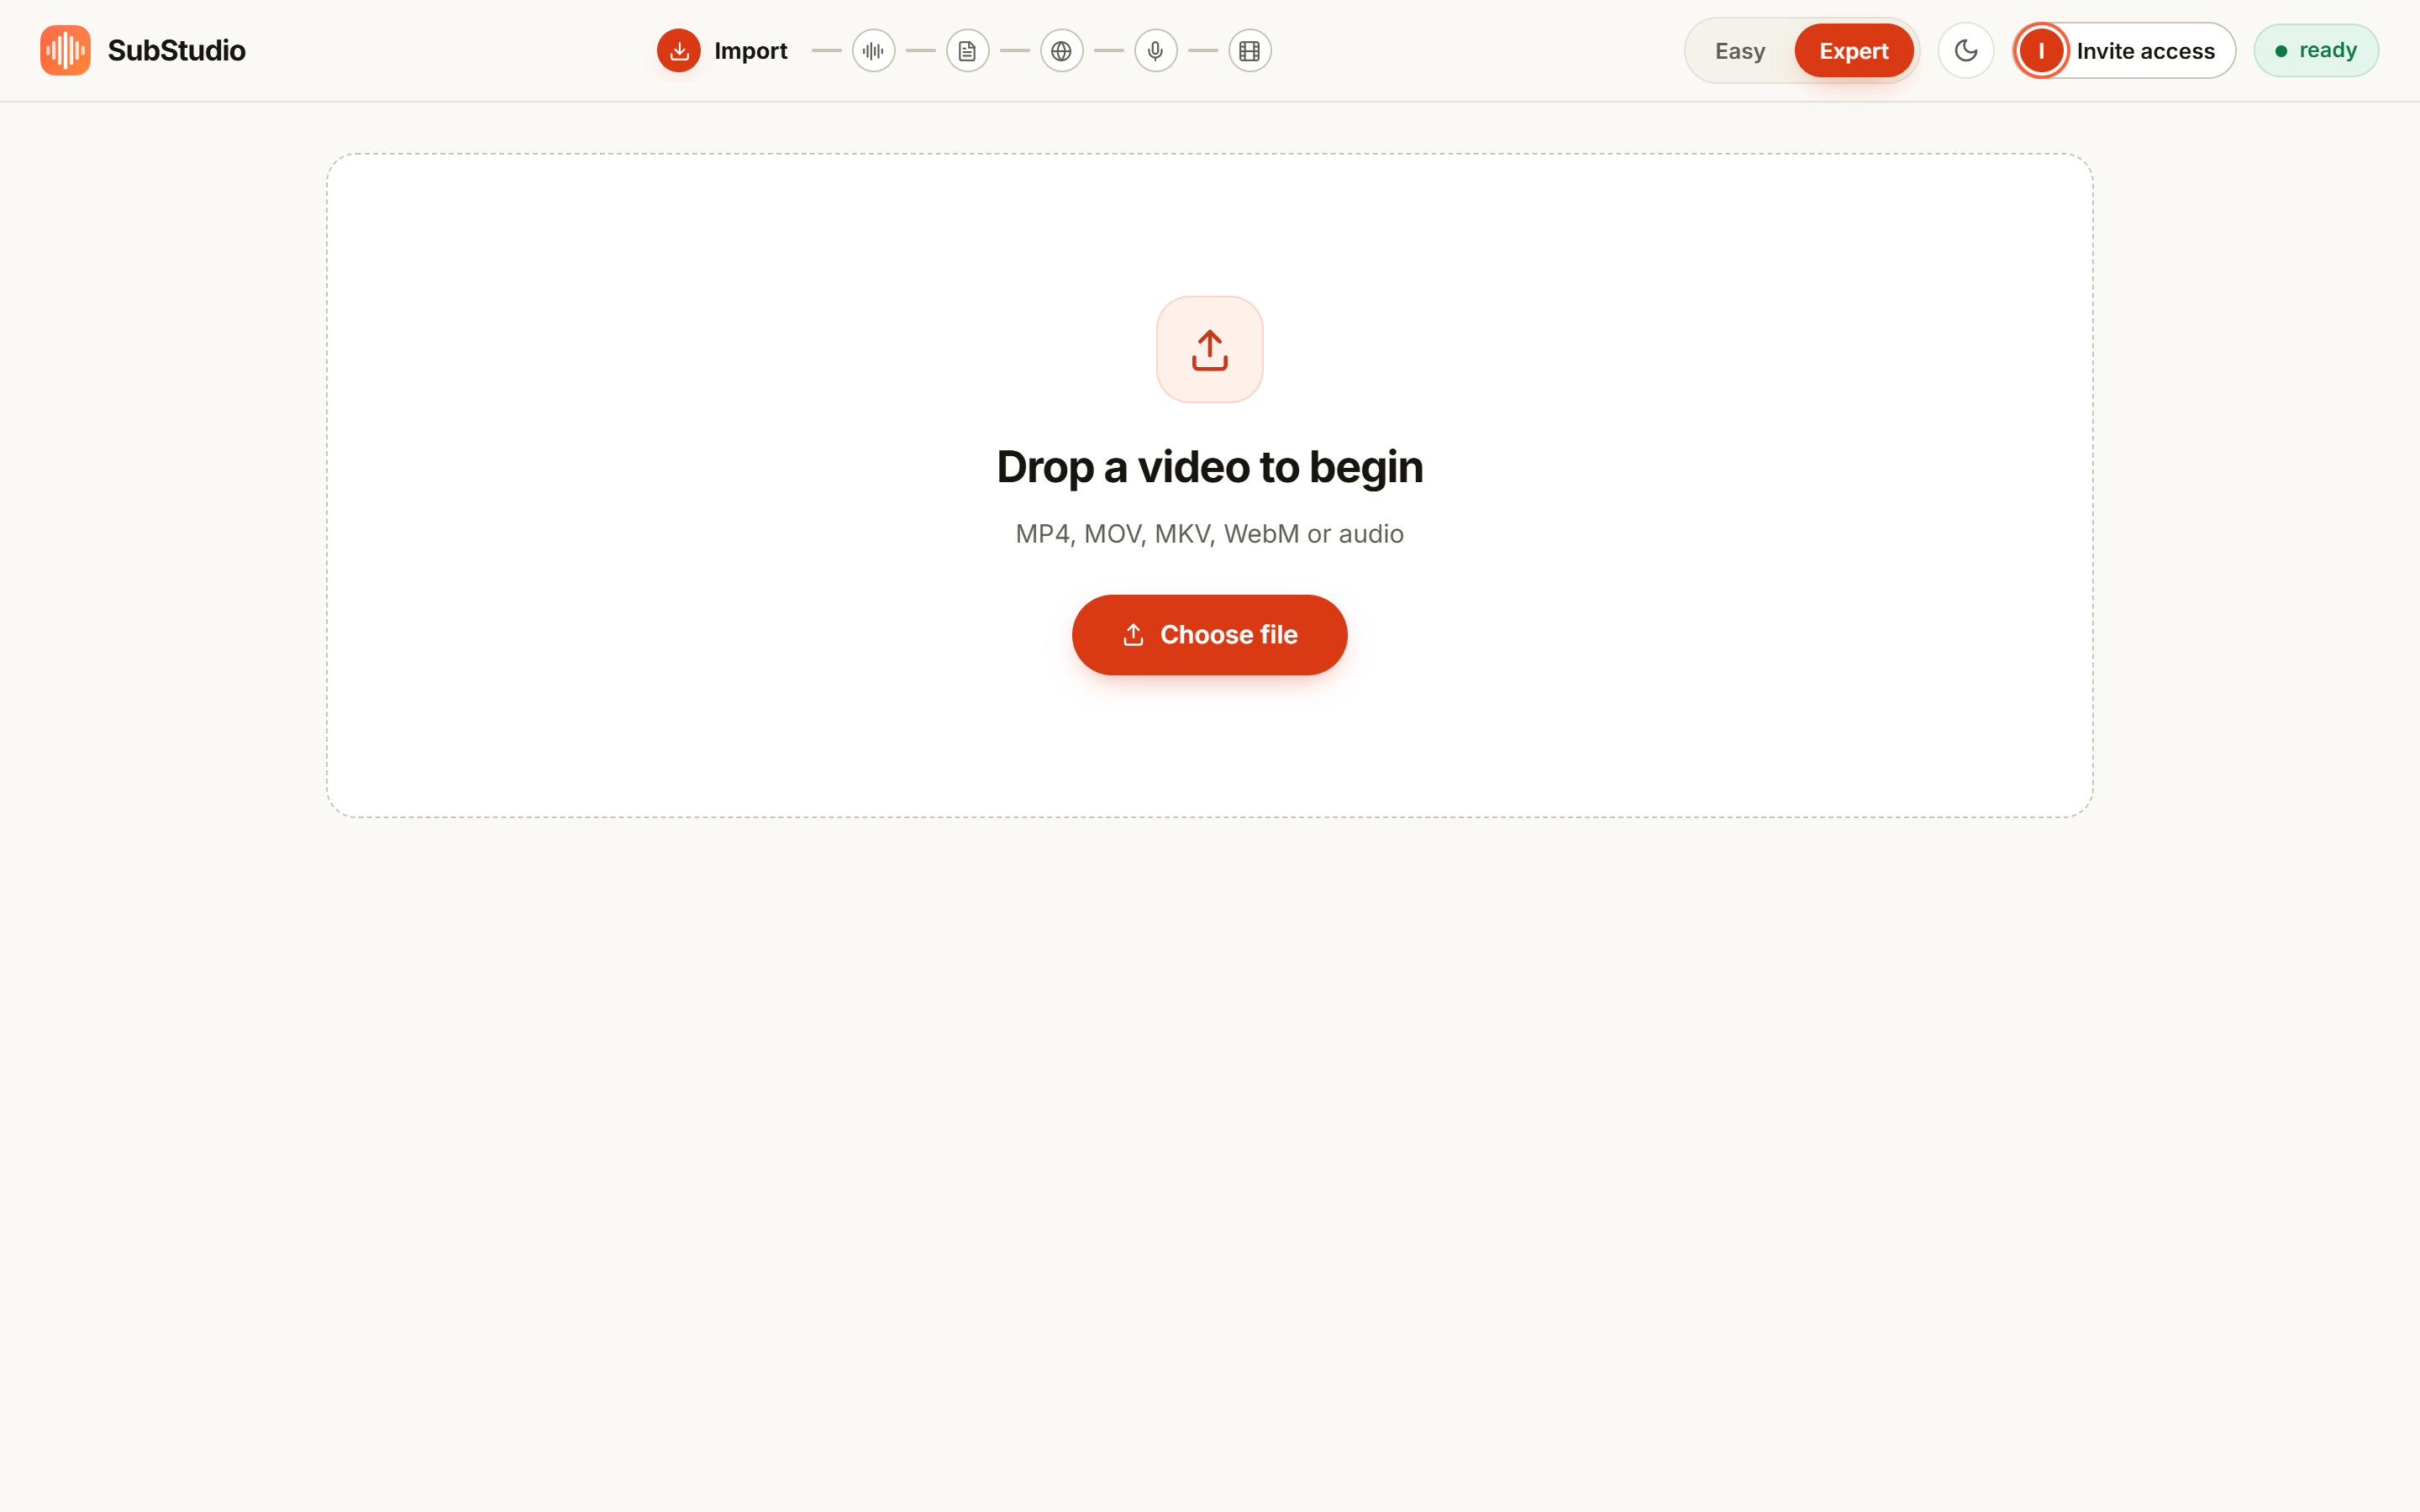
1. Import the video
Open the studio and drop in any video or audio file — nothing to install, the processing happens in your browser plus a private compute step. The original soundtrack is prepared first so the background music and effects survive the swap later.
2. Read the transcript
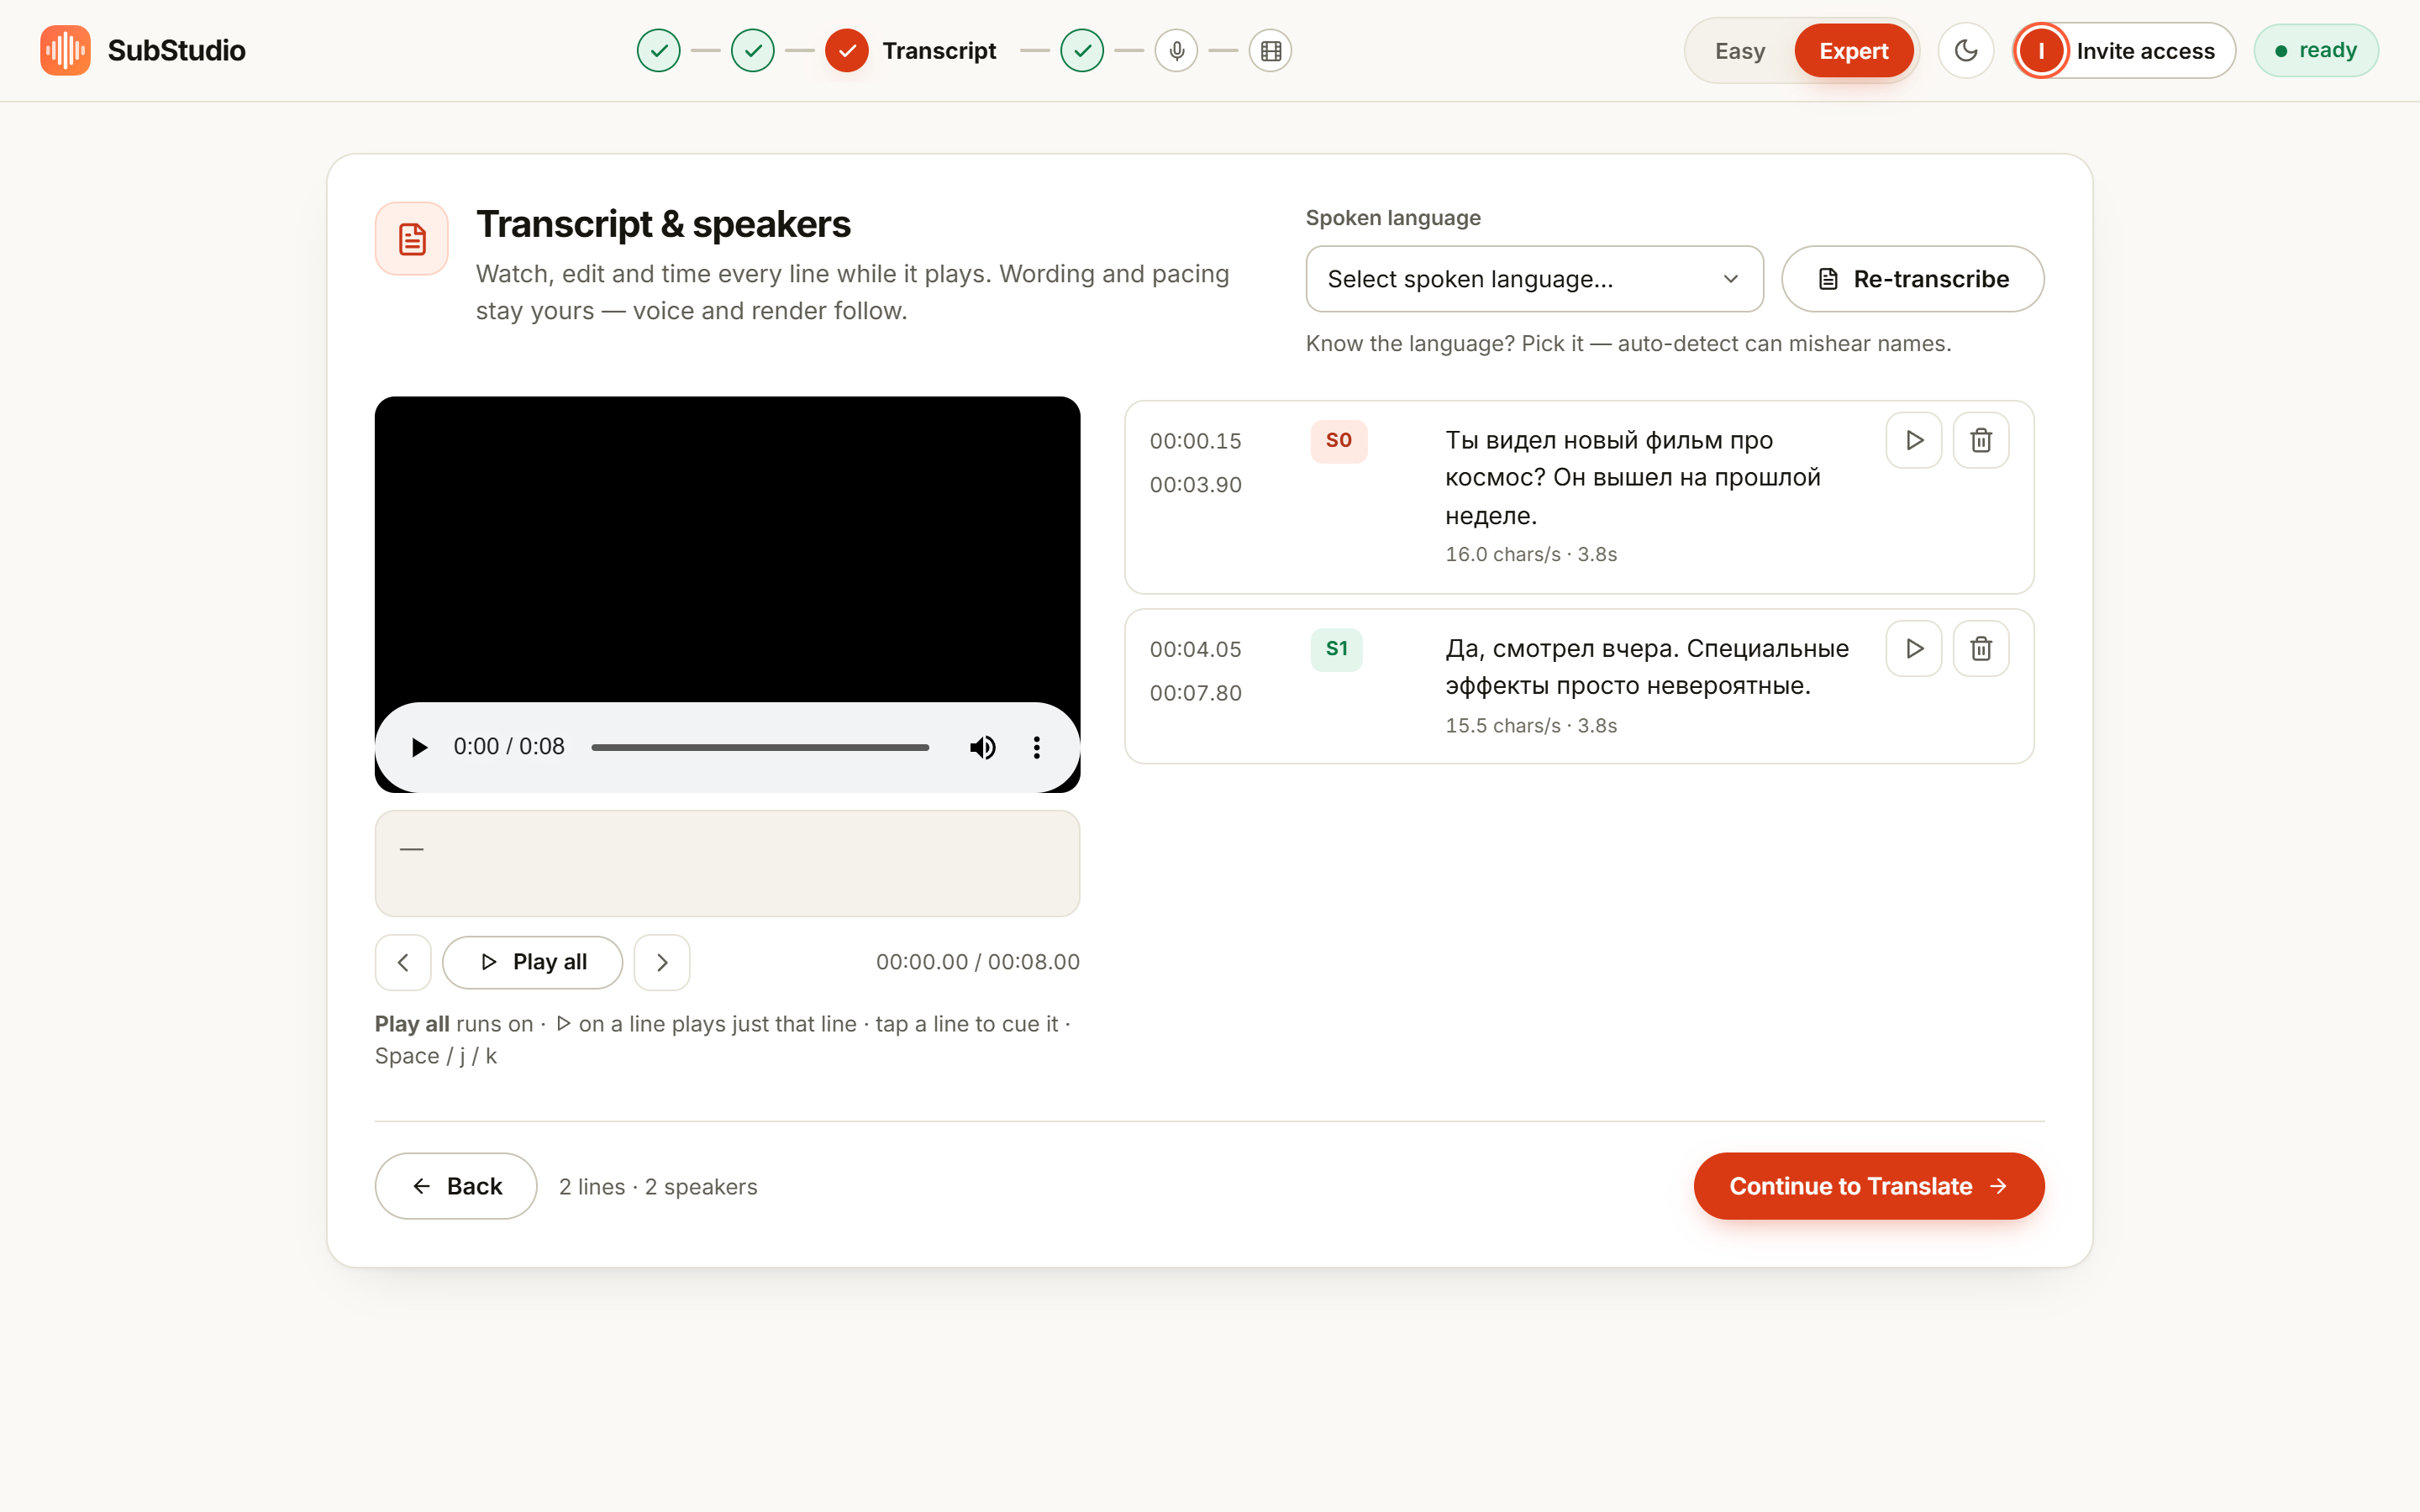
Transcription is where a dub is won or lost. Word-level timing is what lets a reference sample for the voice step be cut precisely; speaker labels are what keep two people from morphing into one. This is also the cheapest moment to fix errors: a wrong word here becomes a wrong word in the generated voice later.
3. Translate to the clock
Translation in a dubbing tool has one extra rule over ordinary translation: the line has to fit its slot. When a translation runs long, the studio condenses it — shorter phrasing, not faster speech — and tells you which lines needed it. If a line is impossible to condense, you'd rather find out now than hear it collide with the next speaker.
4. Re-voice every line
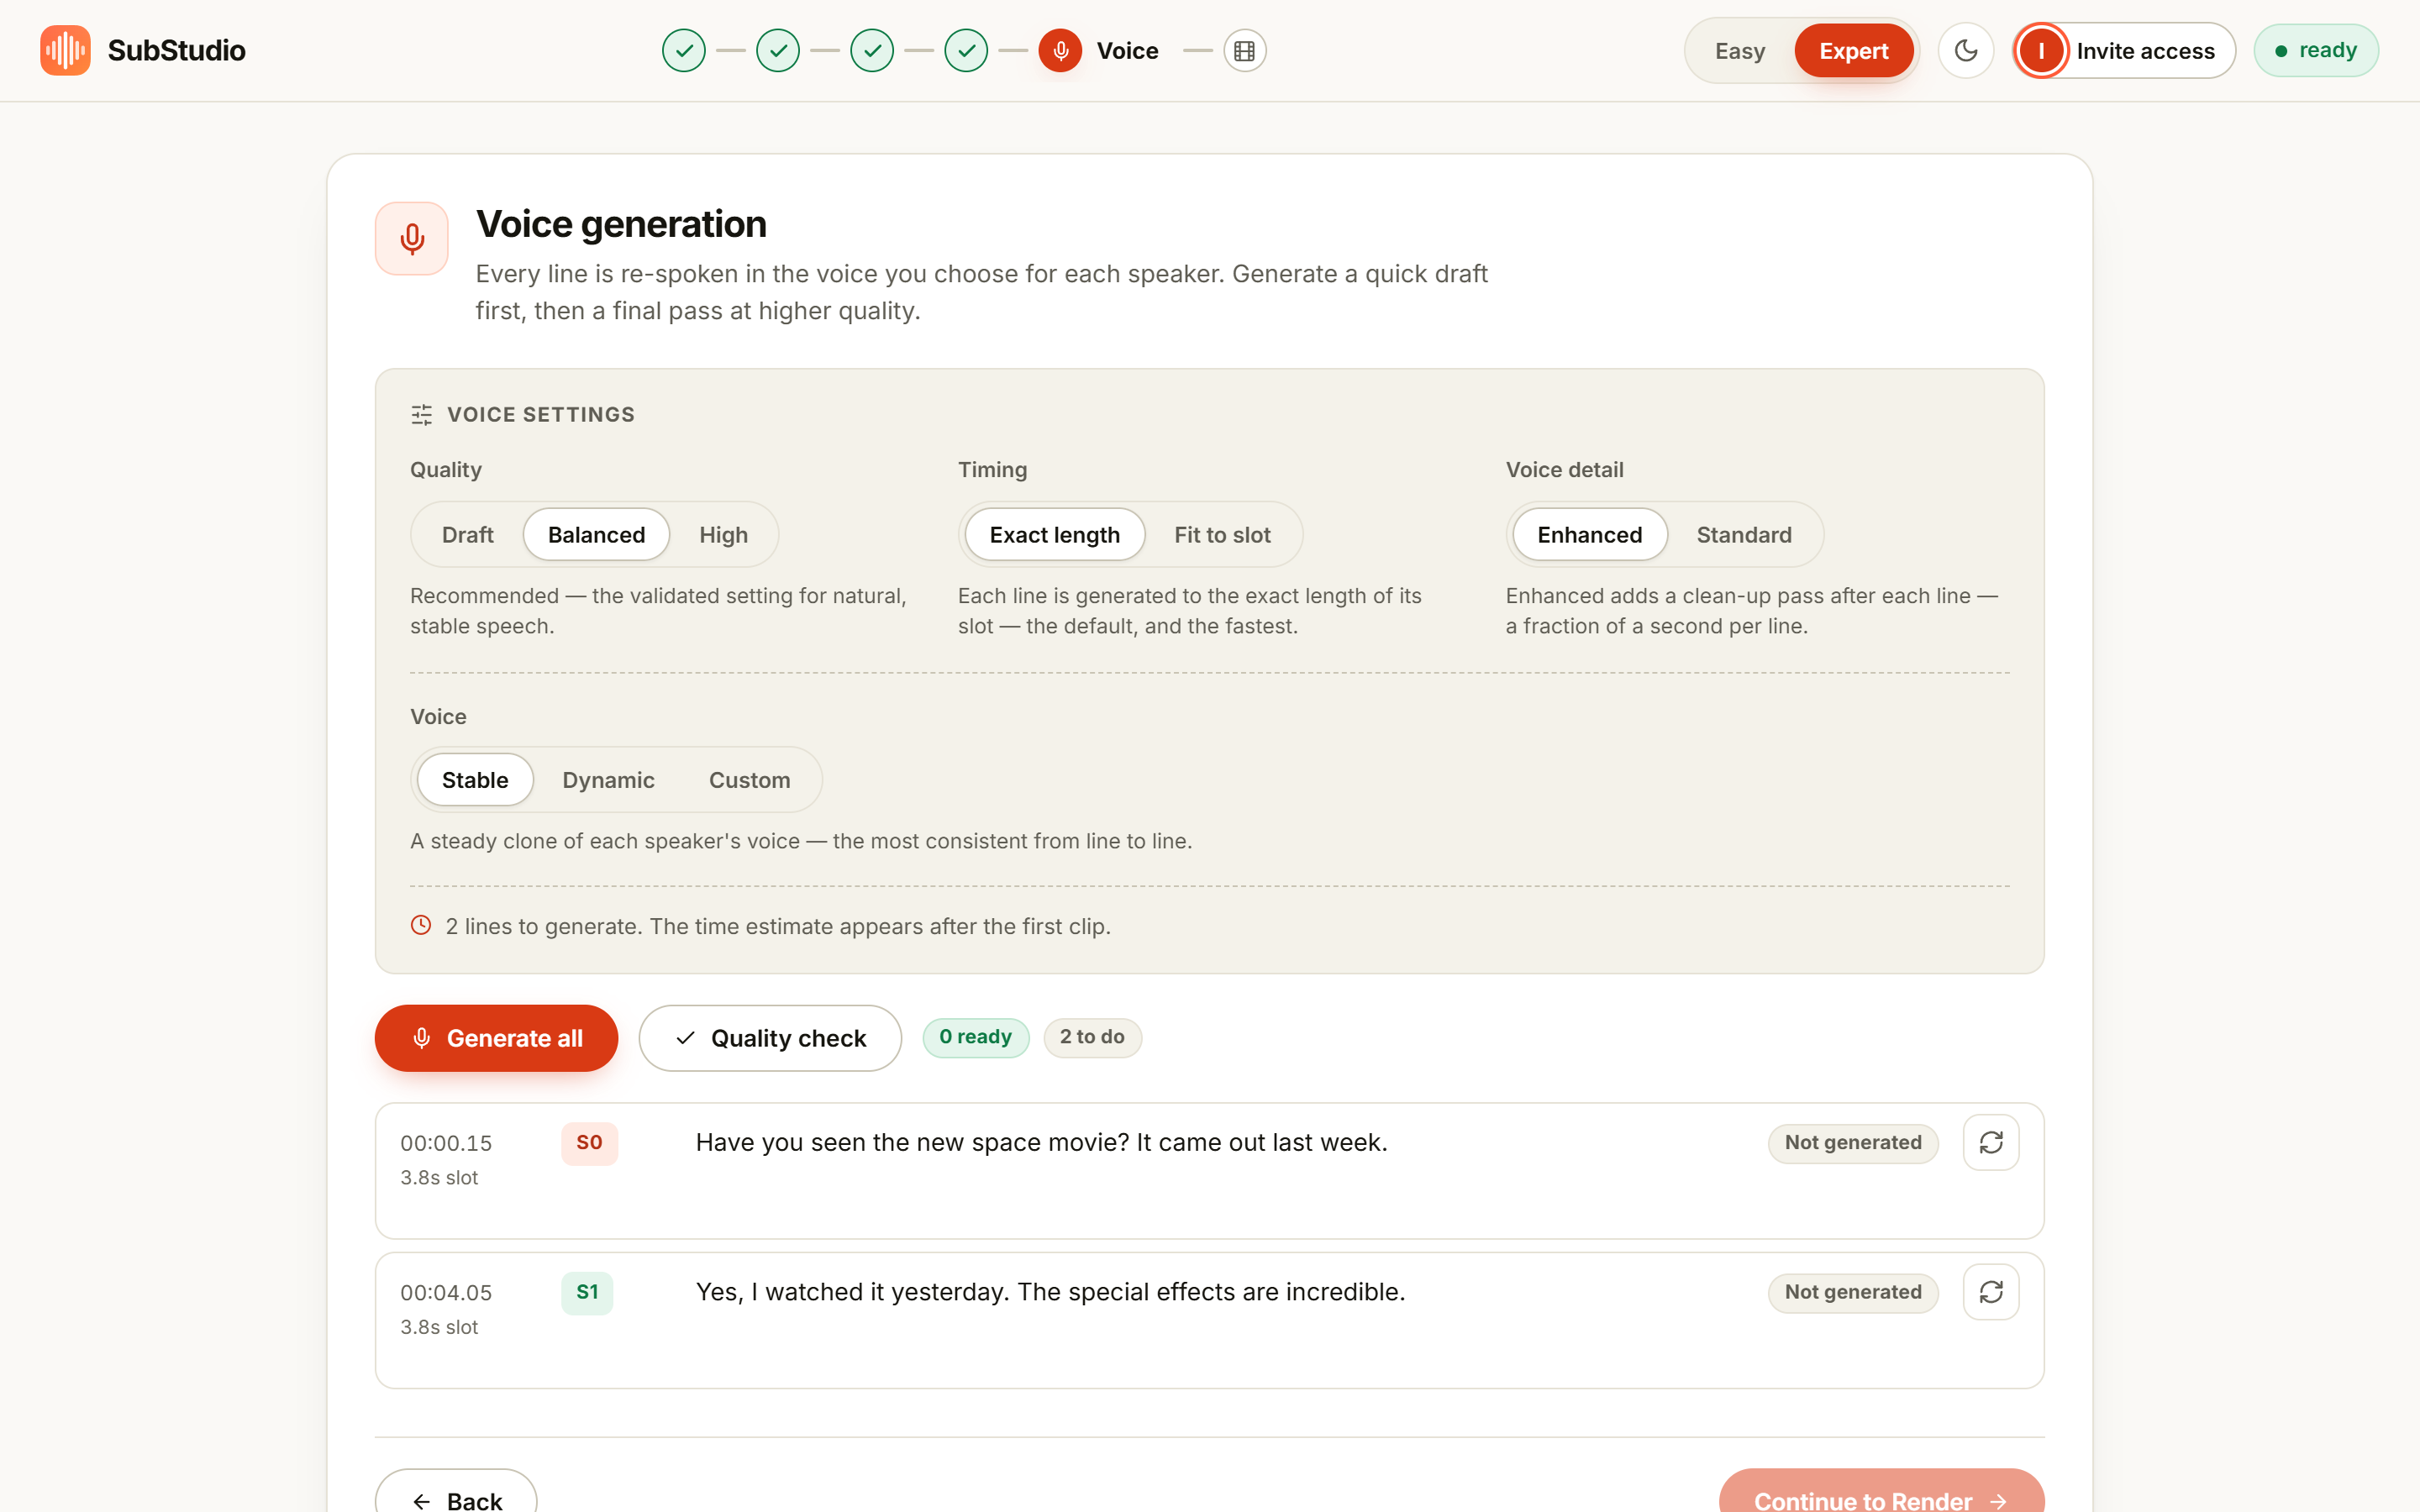
The default in SwiftDub is speaker-preserving: each speaker keeps their own voice, because the model re-speaks the new text using a short window of their original line as reference. You can also give a speaker a designed voice — set gender, age, pitch once, and it stays consistent across every line they say.
Two honest notes from the trenches. First, voice generation is the slow step — expect a few seconds per line at draft quality and longer at higher settings; for a one-minute clip that's a coffee break, not an afternoon. Second, the first fraction of a second of a line is the fragile part: if a reference sample starts mid-sentence, the model can finish that sentence in the original language before switching. SwiftDub's quality check listens for exactly that and offers a re-made take.
5. Mix and export
Mixing keeps your background audio — music, room tone, effects — and replaces only the dialogue. You choose whether the dubbed track is the video's audio or rides alongside the original as a second track. Export options usually include the dubbed video, a standalone dubbed audio file, and subtitles in either language, which most platforms accept as a separate upload.
What it costs
Three routes, wildly different math:
| Route | What you pay | What you get |
|---|---|---|
| Professional studio | Priced per finished minute; voice cast, direction and engineering included | The best quality available — and a bill that makes most one-off videos impossible |
| Freelance / vendor | Per video or per minute, negotiated | Solid for a handful of videos a month; turnaround is days, and revisions cost rounds |
| Self-serve AI | Subscription — SwiftDub Premium is $12.99/month for videos up to 30 minutes | Minutes per clip, unlimited revisions, and you keep creative control of every line |
The real change isn't price, it's the cost of a second attempt. When a dub costs hundreds of dollars, you fix problems after publishing. When it costs minutes, you regenerate the rough line before anyone sees it.
Before you publish: a short checklist
- Listen to the first second of every line. That's where language leaks and clipped starts live — the one artifact audiences notice instantly.
- Check names, numbers and jargon. Automatic translation reliably mangles product names, units and in-jokes. Fix them in the transcript and regenerate those lines.
- Watch the long-line flags. A line marked as not fitting its slot will feel rushed no matter how good the voice is. Shorten the text, not the playback.
- Get a five-minute native review. One speaker of the target language watching with fresh eyes beats any amount of automated checking. This is the highest-leverage money you will spend on the whole project.
- Export subtitles too. Some viewers always watch muted, some are hard of hearing, and translated titles plus descriptions help you show up in search in the new language.
Where to go next
If your video is going to YouTube, read YouTube auto-dubbing vs. your own dub first — YouTube may dub it for free, and knowing when to override that saves wasted work. If you're deciding between dubbing and subtitles at all, that comparison lays out when each one wins. And if you care about voices staying consistent, voice cloning for dubbing covers the mechanics and the consent rules in one sitting.
Dub your first video in the browser
Import a clip, follow the four steps, and hear it in another language today. The free plan covers short clips end to end.
Open the studioFrequently asked questions
How long does it take to dub a video?
For an eight-second clip, the whole pipeline runs in about two to four minutes in SwiftDub — most of it voice generation. Longer videos scale with the amount of speech rather than the runtime, so an hour of interview is a different project than an hour of podcast.
Can I keep the original speaker's voice?
Yes — that's the point of speaker-preserving dubbing. A short reference window of each speaker's own line conditions the generation, so the new language comes out in a voice matched to them. You can also opt for a designed voice instead.
Do I need to speak the target language?
No. But a native-speaker review of the finished dub is still worth arranging — five minutes of a human ear catches what no checker does, especially names, humor and culture-specific references.
What about music and sound effects?
They stay. Dubbing replaces the dialogue track only; the background audio is carried through and mixed under the new voices, with a level you control.
Can I dub a video without the original audio?
You need the original dialogue to transcribe and translate, so a silent video or music-only track can't be dubbed. If the dialogue is buried under loud music, a good pipeline separates voice from background first — that's exactly what the preparation step in SwiftDub does.